Guest Bathroom Makeover with Anewall + Life Update
I’m so excited to reveal our newly re-decorated guest bathroom featuring a gorgeous wall mural from Anewall! This project has been on our minds for a long time, so it felt good to finally get it accomplished. Before the makeover, our guest bathroom walls were still covered in contractor paint from when it was originally built and the décor was a hodge-podge of items we had from our past apartments. Needless to say, my style has evolved over the years and I wanted something more modern. Read on below to learn more about our guest bathroom makeover and why we used an Anewall wall mural.
If you’re here about our life update scroll to the bottom of this post!


We wanted to transform our bathroom, but make sure the project was something we could accomplish in a weekend. Here is what we did to make a big impact within a short timeline:
- Paint the walls and ceiling
- Apply Anewall mural
- Swap out mirror
- Install shelves
- Add modern décor and accessories
To make this space extra special we knew right away that we wanted to use a statement wallpaper. We had toyed with the idea in Olivia’s nursery, but ultimately decided it didn’t work for that space. So, the bathroom was our next opportunity to try it. Anewall offers a curated selection of wall murals in a range of styes. They can be ordered as traditional wallpaper, pre-pasted wallpaper or peel-and-stick. After doing some research and watching Anewall’s installation tutorials for each type of application, we decided that the pre-pasted wallpaper would work best for our skill-set and space.
Once we selected the Dusk & Dawn Ombre Wallpaper, I put together a design board to help me bring our vision to life! A few pieces like the bath mat and sink accessories weren’t available at the time we were completing the project, so you won’t see them in the pictures. However, they’re now available for you to shop below.
Anewall wall murals ship in numbered panels to make putting the pieces together as easy as possible. That being said, applying the wall mural panels takes a lot of patience! Make sure to watch the tutorial several times, read through the directions carefully and gather all of your materials in advance. The first two panels were the most challenging, but after that it was a breeze!

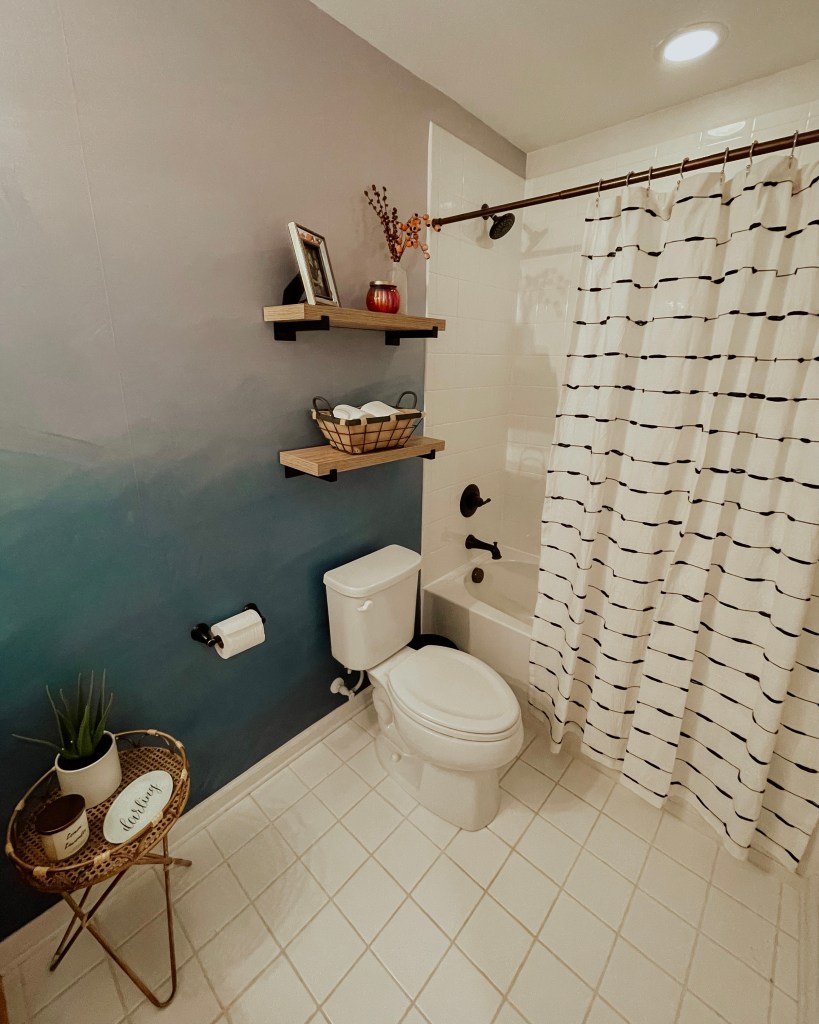


We are so happy with the results of our guest bathroom makeover. The Anewall mural create the bold statement we were looking for! It’s added major value to our home and has helped make this space feel complete.
Along with our guest bathroom reveal, I wanted to announce a big life update…
WE’RE MOVING! While we love our current house and neighborhood (especially the neighbors) we had been thinking about making the move to a larger house to accommodate our growing family. With the real estate market being hot in Charlotte right now, the timing was just right. We spent any free time we had during the month of September (which wasn’t very much) prepping the house for sale. Once we got it listed everything happened very quickly! Hence why I’ve been an especially hot mess this October, why we didn’t plan anything for Halloween (we start the moving process this week) and why I’ve been on a cleaning/de-cluttering/closet-purging mission. It’s been crazy!
While we know moving won’t be easy and the holidays will certainly look different this year, we’re really excited about this new chapter. It’s the right step for our family and we hope to find our forever home soon. We can’t wait to share the journey with you!
Cheers!

Thank you Anewall for gifting the wallpaper featured in this post. As always, all thoughts and opinions are my own.


